 |
| The line-up for this all-star baking fun day.... Find my recipes here. |
It may seem strange to have a blog post on building a gingerbread house, in the midst of spring. Well, I have never been accused of being normal and I have no intention of starting now.
In my defense, I am a planner. I honestly start planning my projects a year in advance. Not because I am a control-oriented, micro-managing, uber-prepared person. Simply because, well... I love this type of project, and facing the end of it is heartbreaking. So, putting my head into the upcoming version calms the blues a bit.
Recent years have not seen the construction of a gingerbread sculpture. In addition to my holiday baking, I have made hosting the family bake-off as part of my holiday tradition (you can read more about that
here.) Between my holiday cookies and the family bake-off, I have left little time to construct a gingerbread piece - but that is all set to change this year.
 |
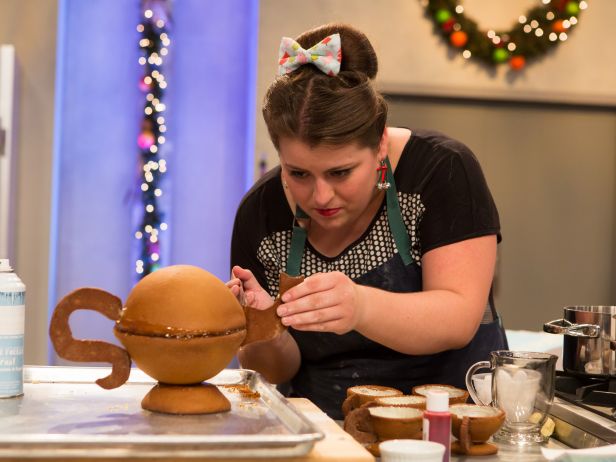
Erin Campbell in the season finale of the Holiday Baking
Championship. Photo Credit FoodNetwork.com. |
I have been tracking inspirations on my
Gingerbread Pinterst Board for several years, but I have been toying with an idea that I am crediting to Erin Campbell of the
Food Network's Holiday Baking Championship Season 1.
Erin's gingerbread tea party (complete with tea pot, cups, saucers, plates, and treats) gave me a perspective that I had completely been lacking. Gingerbread does not have to be in a house form - it can be brilliant in just about any form. And so - challenge accepted!
I have not completely settled on what non-house form that I am going to attempt. I have been giving a lot of thought to simplicity. Which takes me back to the last house I made - the gingerbread house from the holiday season of 2013.
I have made many a candy-coated creations, with sugar windows, and creative takes on ice cream cones, wafer cookies, and the lot. 2013 was one of my more frugal years, and so I approached the project with the concept of being creative with what I had on hand. I had ingredients to make the gingerbread cookie dough, royal icing, green sprinkles, sugar pearls, and edible dusting glitter. This is how it worked out:
 |
| The first step to ensuring your structure will withstand all you have in store for it, is the building material - the cookie dough. Secondly, the baking time and temperature. The dough should be evenly browned - no burnt edges, and firm when baked and cooled. I like to roll out a piece for a test-bake as sometimes it is difficult to gauge if you have removed enough moisture from the dough. This batch of cookies ended with my ideal bake. |
 |
| This was cut from my second batch of cookie dough, and I did not head my own advice and test bake. My eggs might have been slightly larger, or my other wet ingredients may have been measured with a slightly heavy hand. You can see the small cracks on my pieces - due to the slightest bit of excess moisture. It was not bad enough to scrap them, and the cracks were easily covered with decorations. |
 |
I cannot imagine making royal icing without my stand mixer. I am quite confident the hand mixer can handle small batches, but I tend to make huge batches to accommodate the amount needed to make all of the decorations as well as hold the house together.
I like to have a thick blend for my royal icing. I mix it up super thick and then spoon bits into bowls and add small amounts of water if I need it more fluid. |
 |
Prior to assembling the house, I prefer to pipe out all of my decorations and let them set overnight. In this case, I made mini wreaths that I tinted with sprinkles to give an look of green. To do this, I simply folded the sprinkles into the icing - taking car not to let them dissolve.
I dotted the wreaths with sugar pearls to make them appear like a wreath with glass ball ornaments. |
 |
| I used the same mix of royal icing and green sprinkles to create the tree that would adorn the back wall of the home. Prior to piping the tree, I set a piece of wax paper atop the template I used to cut the wall of the house. This was my guide to ensure proportions were correct. The star on top of the tree was added in plain white royal icing, and once dry, I dry-dusted it with silver edible glitter dust (just dipping a dry paint brush into the glitter and applying it to the dry icing). |
 |
| Decorating the walls prior to construction is the only way I can ensure consistency. I actually use a ruler and a toothpick to make indents on my dough for spacing and window size. |
 |
| I wish I was as expert as I appear to be when it comes to piping royal icing. The intricate decorative work is actually a clever trick I devised, especially for this project. I printed the pattern on a plain piece of paper and cut out small blocks around the pattern.. I placed the small paper on the cookie, holding it in place with 2 straight pins, and used the tip of a mechanical pencil (without led) to make indents in the form of the pattern. I removed the paper and used the indents as my guide for piping the fancy work. |
 |
| Another opportunity to use my ruler and toothpick to make guidelines. My roof pattern was a grid, created with my toothpick, that I connected with royal icing. Each connection point has a sugar pearl, adding just a bit of elegance to a simple roof line. |
 |
| I used royal icing to adhere my previously made, and now dry, decorations If applying royal icing (the wreaths) to other royal icing elements (the windows) it is ideal to have both decorative elements set first, and then connect them with a fresh dab of royal icing. Otherwise you risk damaging one of the elements or loosing the three-dimensional effect (the wreaths appear to be hung on windows but if I had applied them directly to the wet window frame then they would have the potential to squish the window frame). |
 |
| I have cut and decorated chimney pieces for every project, but rarely use them. I would love to say that it comes down to a design element decision, but it does not. The reality - you have to leave roof space clear of royal icing and decorations in order to get a flush attachment of the chimney. I always forget this and find myself chomping on decorated chimney pieces that could not be attached without me trying to remove cured royal icing. |
 |
| All of the pieces are decorated and construction is ready to begin. Before you lay your first dab of construction adhesive (royal icing) you have to decide whether your side walls will be inside or outside of the front and back walls. When this decision has been made you will be able to get an idea of the house measurements. I typically cut strips of wax paper, in the length of my longest side, and tape it to the outer edge of the board. I use this as my guide when placing the first wall. From there it is just a matter of using a ruler to ensure that your walls are straight (measuring the distance from the side of your base to the edge of the cookie, in multiple points). |
 |
| The final touch, to really sell this as a winter show-placed home, was a dusting of powdered sugar. |
 |
| I used a small knife to spread a thin layer of royal icing along the base, continuing the illusion of snow. |
 |
| Sweat the small stuff not! My tree cracked during application. That was, honestly, the only thing I could whine about. It was barely even whine-worthy. |
 |
| I must confess, there was always a temptation to dot a few mini M&M's as "holiday lights" on the border of the roof. I even considered baking up sugar cookies with green coloring to be trees. In the end, I decided less was more. This time, it actually was. I loved the simplistic and clean styling. |


No comments:
Post a Comment
Note: Only a member of this blog may post a comment.